Aligning Content#
Welcome to our tutorial on aligning content in Panel! Let’s dive into exploring various alignment, margin, and spacing options to make your content look polished and visually appealing.
Understand Alignment Options#
In this tutorial, we’ll delve into three key aspects:
Alignment: You can
aligncontent horizontally and vertically within a container, choosing from options like'start','center', or'end'.Spacer Component: Utilize
Spacercomponents to adjust alignment or add space between content.Margin: Fine-tune alignment by adding
margins to content elements.
Let’s jump in and explore these concepts in action!
Exercise: Align Cards#
Let’s practice aligning cards within a container. Run the code snippet below:
import panel as pn

pn.extension()

image = pn.pane.PNG("https://assets.holoviz.org/panel/tutorials/wind_turbine.png", height=150, sizing_mode="scale_width")

card1 = pn.Card(image, title='Turbine 1', width=200)
card2 = pn.Card(image, title='Turbine 2', width=200)

pn.Column(
    card1, card2,
    sizing_mode="fixed", width=400, height=400, styles={"border": "1px solid black"}
).servable()
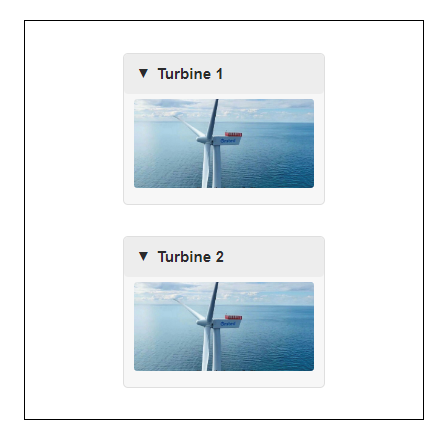
Your task is to align each card in the center of its respective vertical half. There are many possible solutions, but your solution should resemble the image below:
Solutions
import panel as pn

pn.extension()

image = pn.pane.PNG("https://assets.holoviz.org/panel/tutorials/wind_turbine.png", sizing_mode="scale_both")

card1 = pn.Card(image, title='Turbine 1', height=150, width=200, align="center")
card2 = pn.Card(image, title='Turbine 2', height=150, width=200, align="center")
spacer1 = pn.Spacer(height=33)
spacer2 = pn.Spacer(height=33)
spacer3 = pn.Spacer(height=33)

pn.Column(
    spacer1, card1, spacer2, card2, spacer3,
    sizing_mode="fixed", width=400, height=400, styles={"border": "1px solid black"}
).servable()
import panel as pn

pn.extension()

image = pn.pane.PNG("https://assets.holoviz.org/panel/tutorials/wind_turbine.png", sizing_mode="scale_both")

card1 = pn.Card(image, title='Turbine 1', height=150, width=200, align="center", margin=(33,0,17,0))
card2 = pn.Card(image, title='Turbine 2', height=150, width=200, align="center", margin=(16,0,33,0))

pn.Column(
    card1, card2,
    sizing_mode="fixed", width=400, height=400, styles={"border": "1px solid black"}
).servable()
Recap#
In this tutorial, we’ve explored various alignment and spacing options for content in Panel:
Alignment: Adjust content
alignmeant horizontally and vertically within a container.Spacer Component: Utilize
Spacercomponents to align or add space between content elements.Margin: Fine-tune alignment or add space between content using
margin.
Now, you’re equipped with the knowledge to beautifully align and space your content in Panel!
